

So, we've been hiding out in our basement LEGO room. Long time, no see, right? I know it's been a minute.
When the pandemic hit, we, like many of you guys as well, spent our time trying to work while acting as teacher/short-order cook/entertainment director.
It was exhausting.
And little by little, we've began to work again on the winter village. But in order to implement the big plans we have for the village, we needed a space to work in.
After we got done with all of our outdoor projects, we turned our attention to our basement LEGO room. We're slowly converting it from storage to an actual working space! We still have a ways to go, but thought I'd give you a look regardless.
In The Beginning...
If you remember, my mom lives with us and we were in the process of building out the basement for her. We started this whole basement reno back in 2019. It was very, very barebones down here.
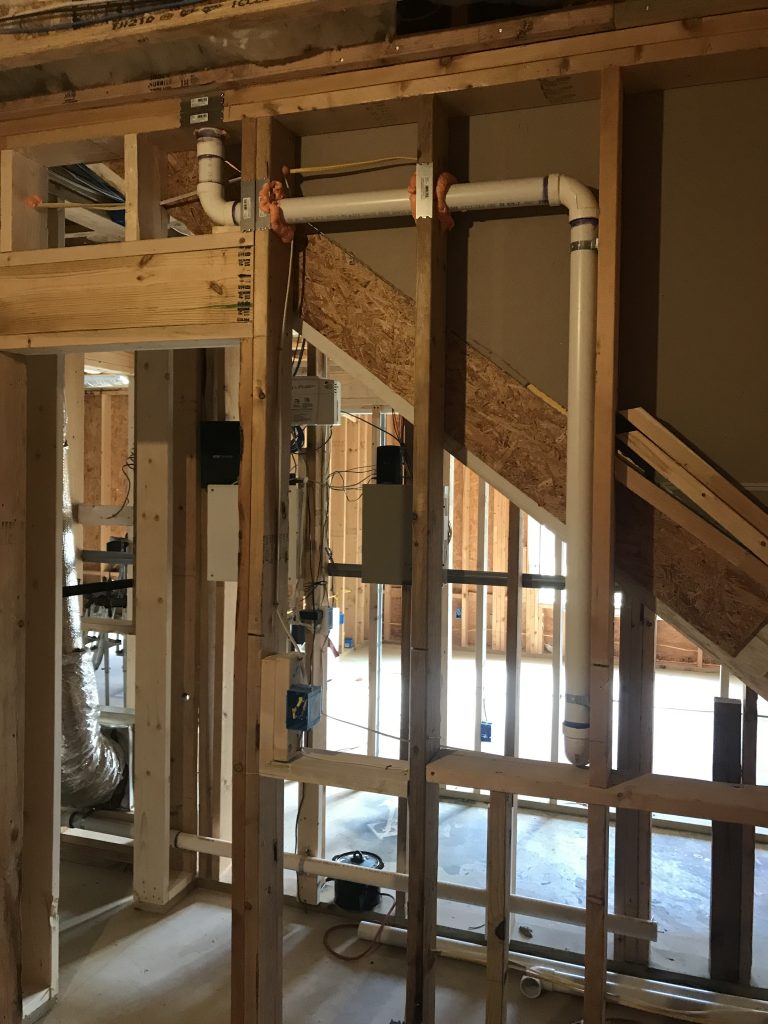
Our plan was always to keep this section of the basement for a LEGO room.
Seems a little on the small side, huh? Fortunately, we had an amazing contractor who was able to sketch out our space so my mom could live in peace and we could also have our own LEGO space.
Building Out The Space
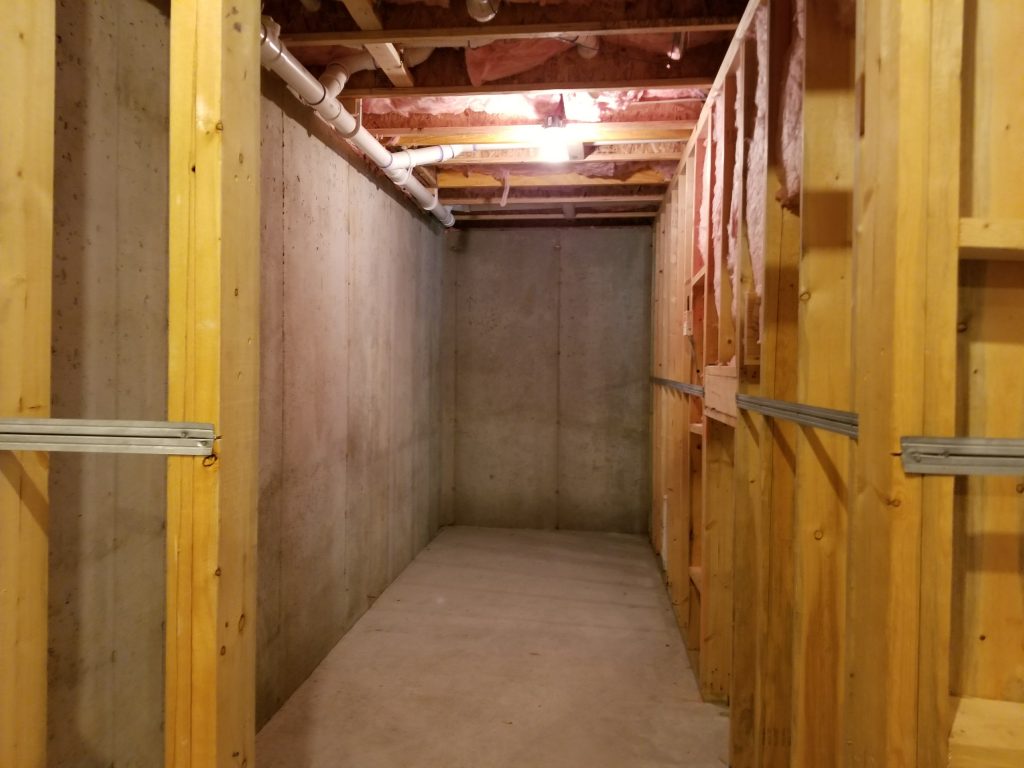
I wish I had thought to take pictures of the whole process, but the space we built is 3 times as wide as what you see in the image above. We also had our contractor put up a dividing wall between our LEGO room and what was going to be a small seating room.
Once we saw how small the space was finished, I was nervous that we wouldn't be able to fit all of our LEGO and a working space in the same area. The dividing walls felt like they were in the way, as well as the swinging door, for what we wanted to do at the time. It all just made me nervous we wouldn't love the space once it was all done.

I wish I had spoken up sooner, because once we saw the finished product, we made the decision to have the contractor knock down the dividing wall.

It cost us a pretty penny, but as you can see in the photo above, it really opened up the space for us. It was the right decision for us and we are so happy we made it.
Moving In The LEGO
Once the room was built, it was time to move it all back in. Sadly, it made for an insanely cluttered space. Part of the problem was that we really didn't have storage or display space for anything.

The other issue dealt with how we moved everything out of the other house. There was no rhyme or reason to how we packed our LEGO, so in one box we might find shoe bins of loose brick, random boxed sets and sorting supplies. Made it all quite difficult to organize and estimate what we did and didn't have.
It was definitely time to buy storage solutions.
Our Storage Solutions for the Basement LEGO Room
We made several trips to IKEA, buying bits and pieces of what we thought would work for us, before we finally settled on our ideal solution.

First, we started with some simple tables. We bought 2 LINNMON table tops in white and the coordinating ADILS legs to match. This worked well as a staging area for us to put some of the sets and get some organization.

We also bought 2 DELTOF glass door cabinets to go on either side of the room. You can see them towards the back of the picture above.
Hidden below the mess of LEGO are also 2 BESTÅ cabinets with glass doors. The plan is to have a place for everything, and everything in its place... eventually. For now, you'll just have to trust us that they are there.
There was also a plan to put some display cases in-between those two BESTÅs, but we're not there yet.
As you can see, this still didn't give us the building space we wanted. We had to pivot our plan to include some dedicated storage for sorted LEGO and quick!
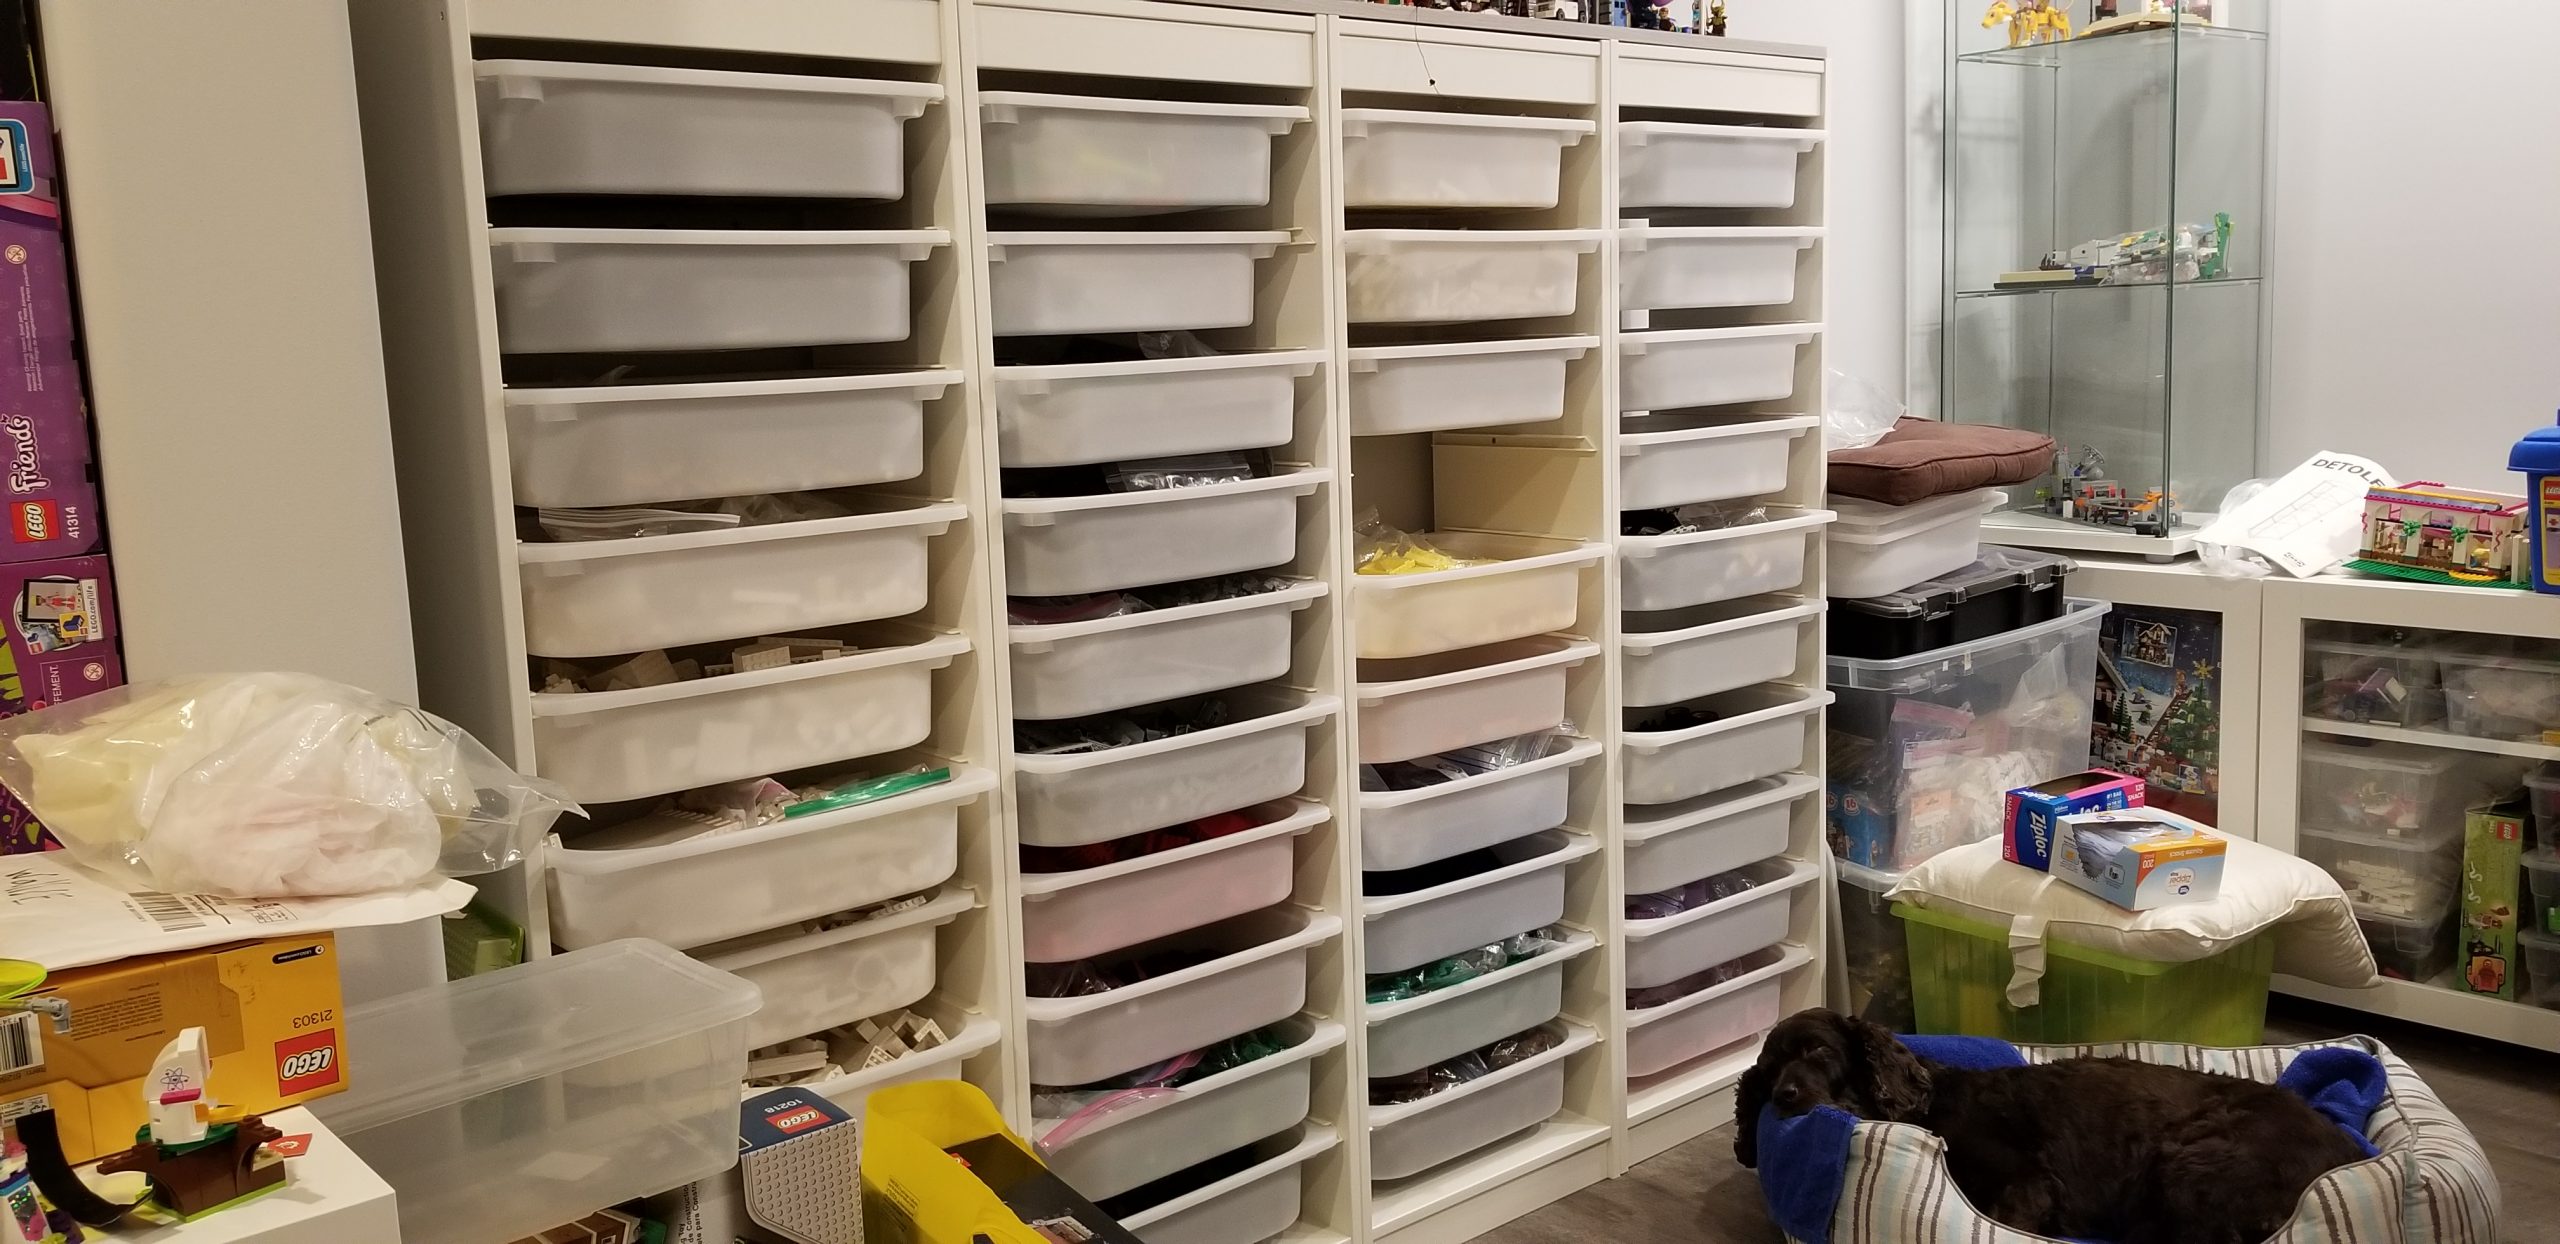
That's when we decided to purchase 4 TROFAST frames and companion boxes to move our bagged and boxed LEGO into their permanent home. It's worked fairly well for us so far; however, we've already run out of space again soon after taking this photo.
Above, you can also see the DELTOF glass door cabinets I mentioned were hidden in the previous photo. These again, are full of shoeboxes with random pieces. Sometimes we look at these things and wonder why we collected them in the first place... visions of a grand LEGO shop empire, I guess.
We also realized we needed a place to display our modulars. Yes, we like to build things other than winter village. Surprised?
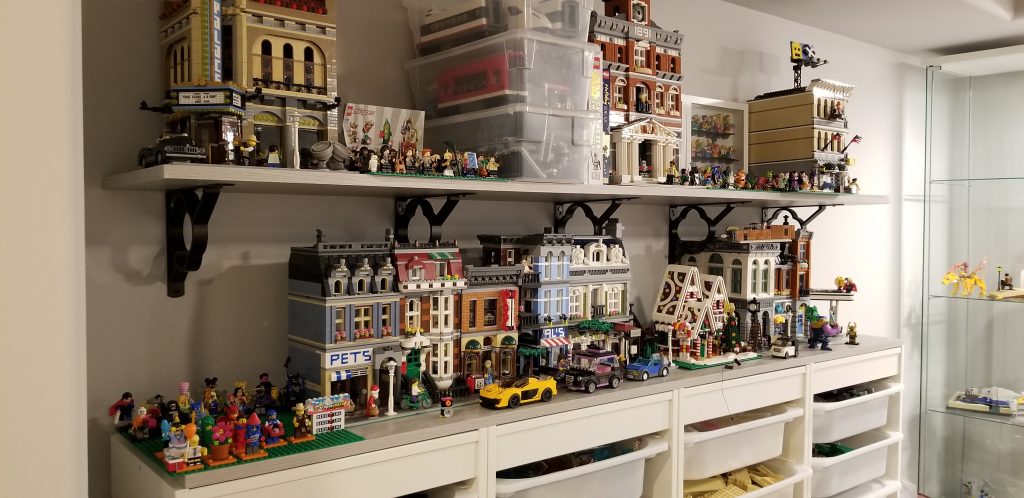
For this solution, we took a trip to our local Lowe's. I like to shop at Lowe's because they provide you with a 10% discount if you are a veteran. There, we found Rubbermaid laminate boards in a grey color, along with these really cute quarterfoil shelf brackets.
We used one of the shelves to keep the TROFAST frames lined up by screwing the board into the TROFAST units. The other one we attached to the wall with the brackets. This gave us two rows for modulars. As you can see, we are quickly running out of space here too. (And it doesn't help that it's also acting as a staging area for our "homeless" minifigures.)
Still with me? Good! Since we were just talking about minifigures, I'll show you our minifigure wall next.
Displaying minifigures

When they still had them, we bought several of the IKEA Ribba frames. Mr. Family Brick went to right to it for creating groupings for each of the minifigure series. We definitely should have bought several more of those as we have 1 left unused and several series unframed. We have some other ideas in mind, but for now, this is how we display them.
There is also another blank wall that I'm eyeing. I'm not quite sure yet how we would display them there, but I'm thinking about a huge wall rack of LEGO built shelves, each housing one minifigure series. It's on the list of things to do. ;)
But you mentioned a working space?
Yes, I did!
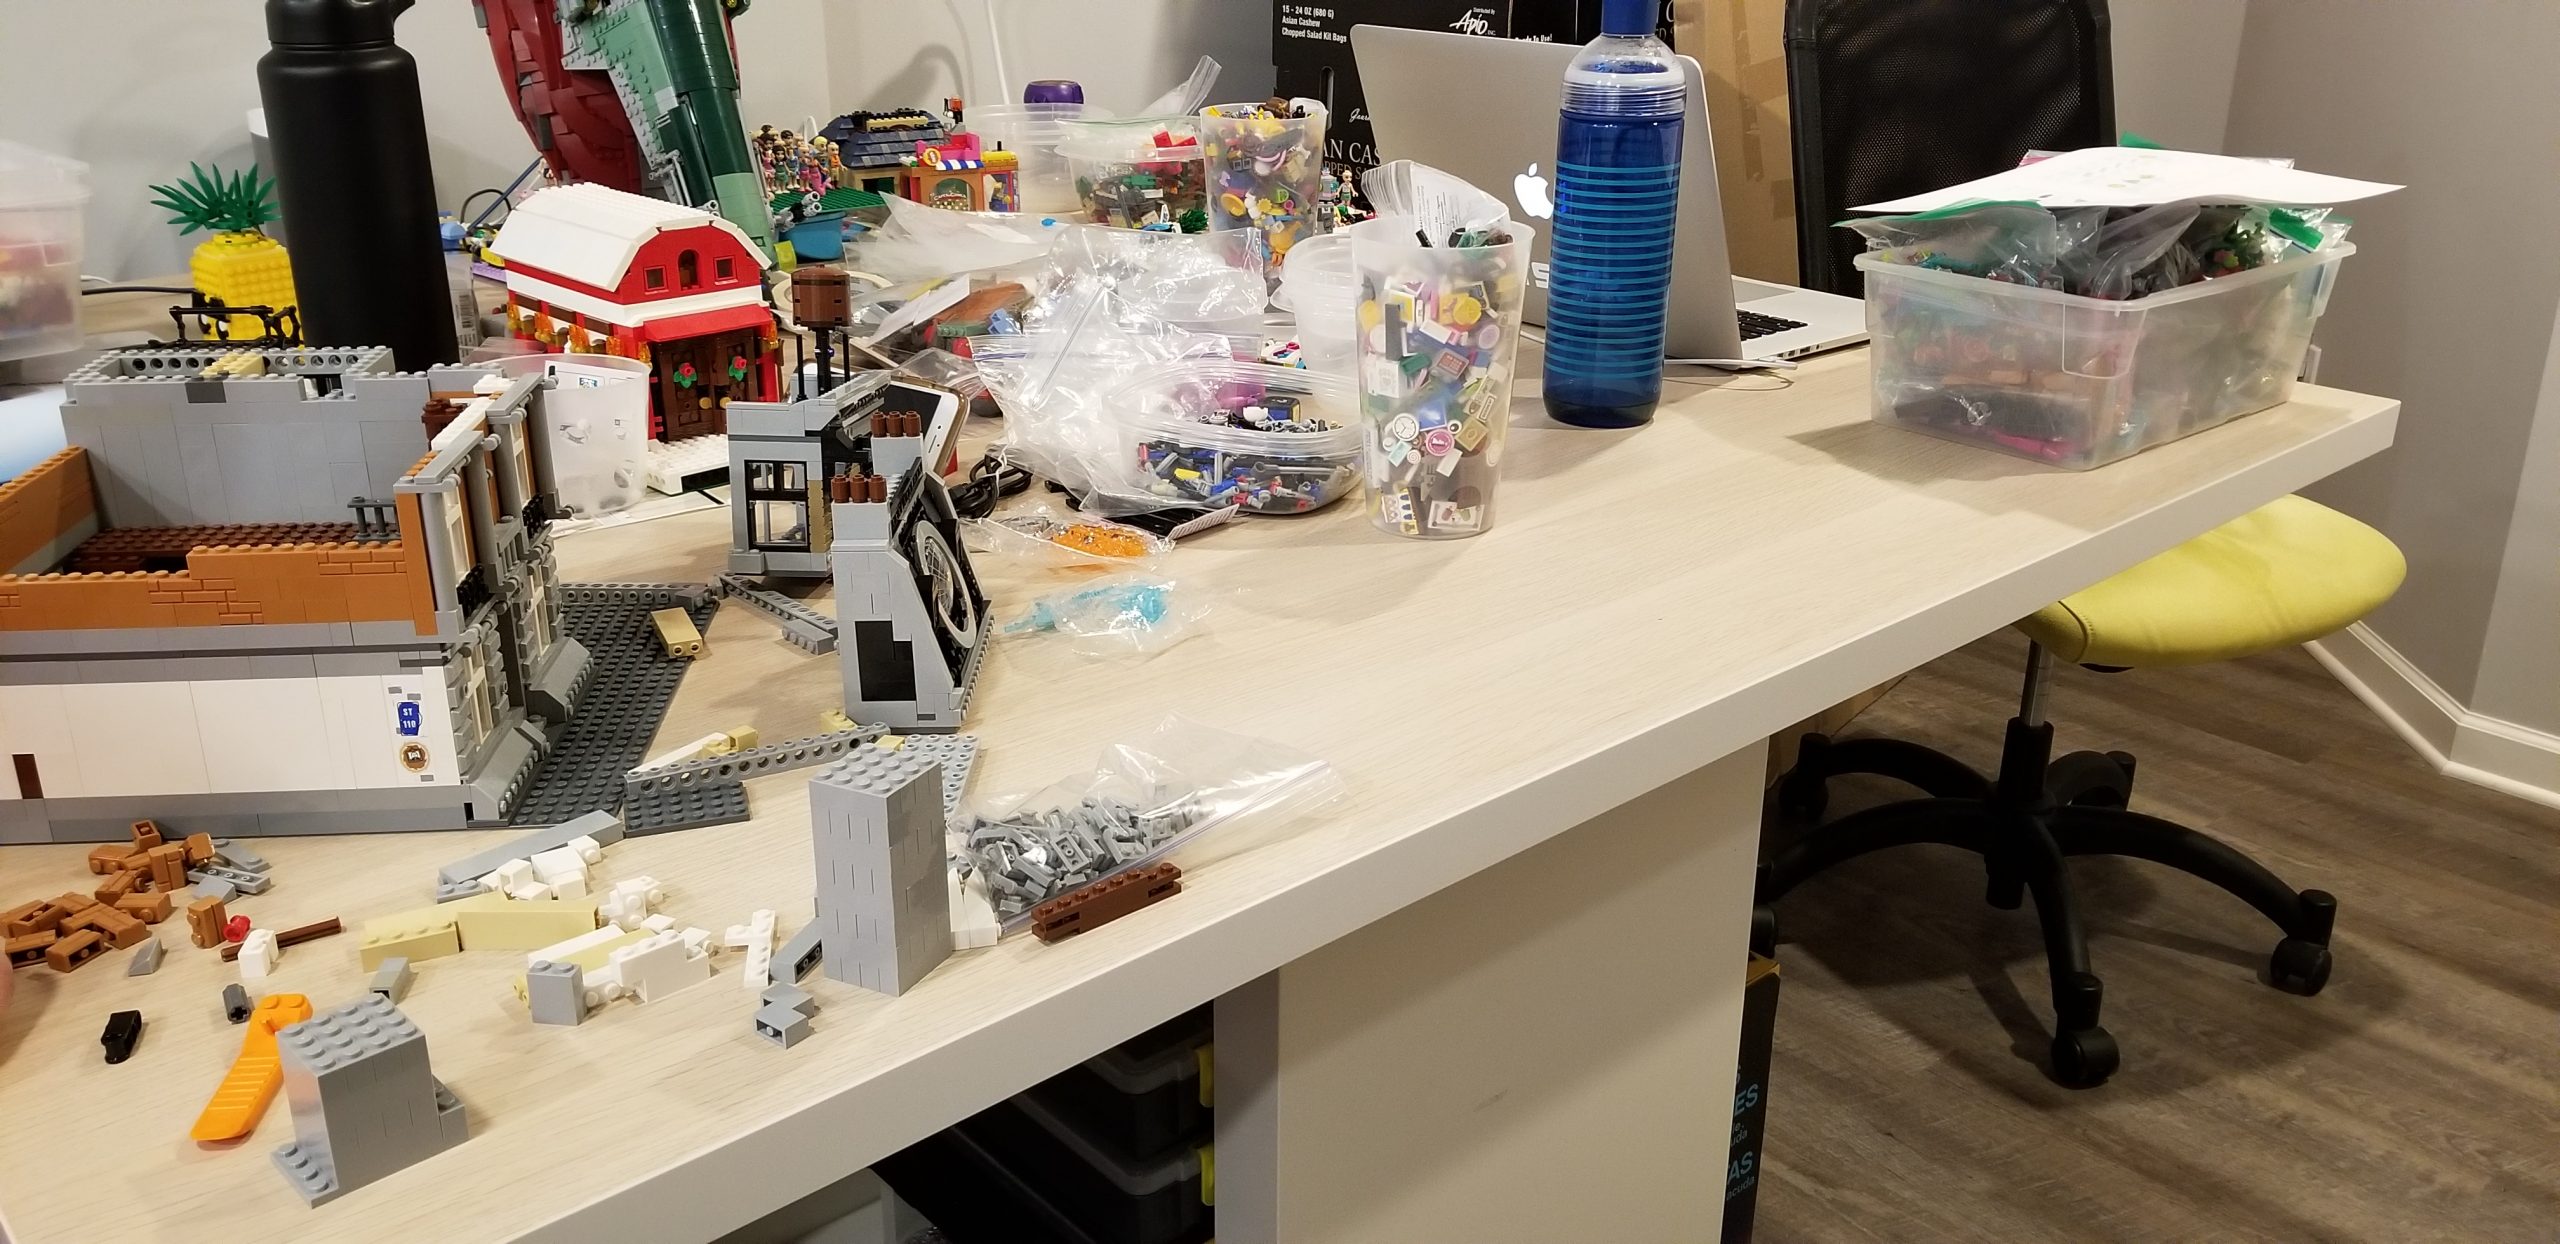
Our final pieces were 2 LINNMON table tops. We had planned a solution that included and older EXPEDIT from the girl's room and 2 of the KALLAX 2x2 units to create a working table big enough for the both of us to work on various projects.
Turns out we didn't really need the KALLAX bookcases, as our idea worked much better with us using Velcro Brand industrial strength strips to attach the LINNMONs to the top of the EXPEDIT.
The KALLAX units then became moveable storage assistants. We'll probably sell them though and purchase another of the stepped TROFAST frames. The Little Brick has one in her room that is not serving its purpose anymore. She's graduated from storing random toys to storing treasured books, so we replaced it with a media cabinet we had sitting idle in our garage from when we moved.
Our plan is to use the stepped TROFAST frames to hold the bins we're using for our current projects. When not in use, we'll move them to an out-of-the-way location.
So What Does The Basement LEGO Room Look Like Now?
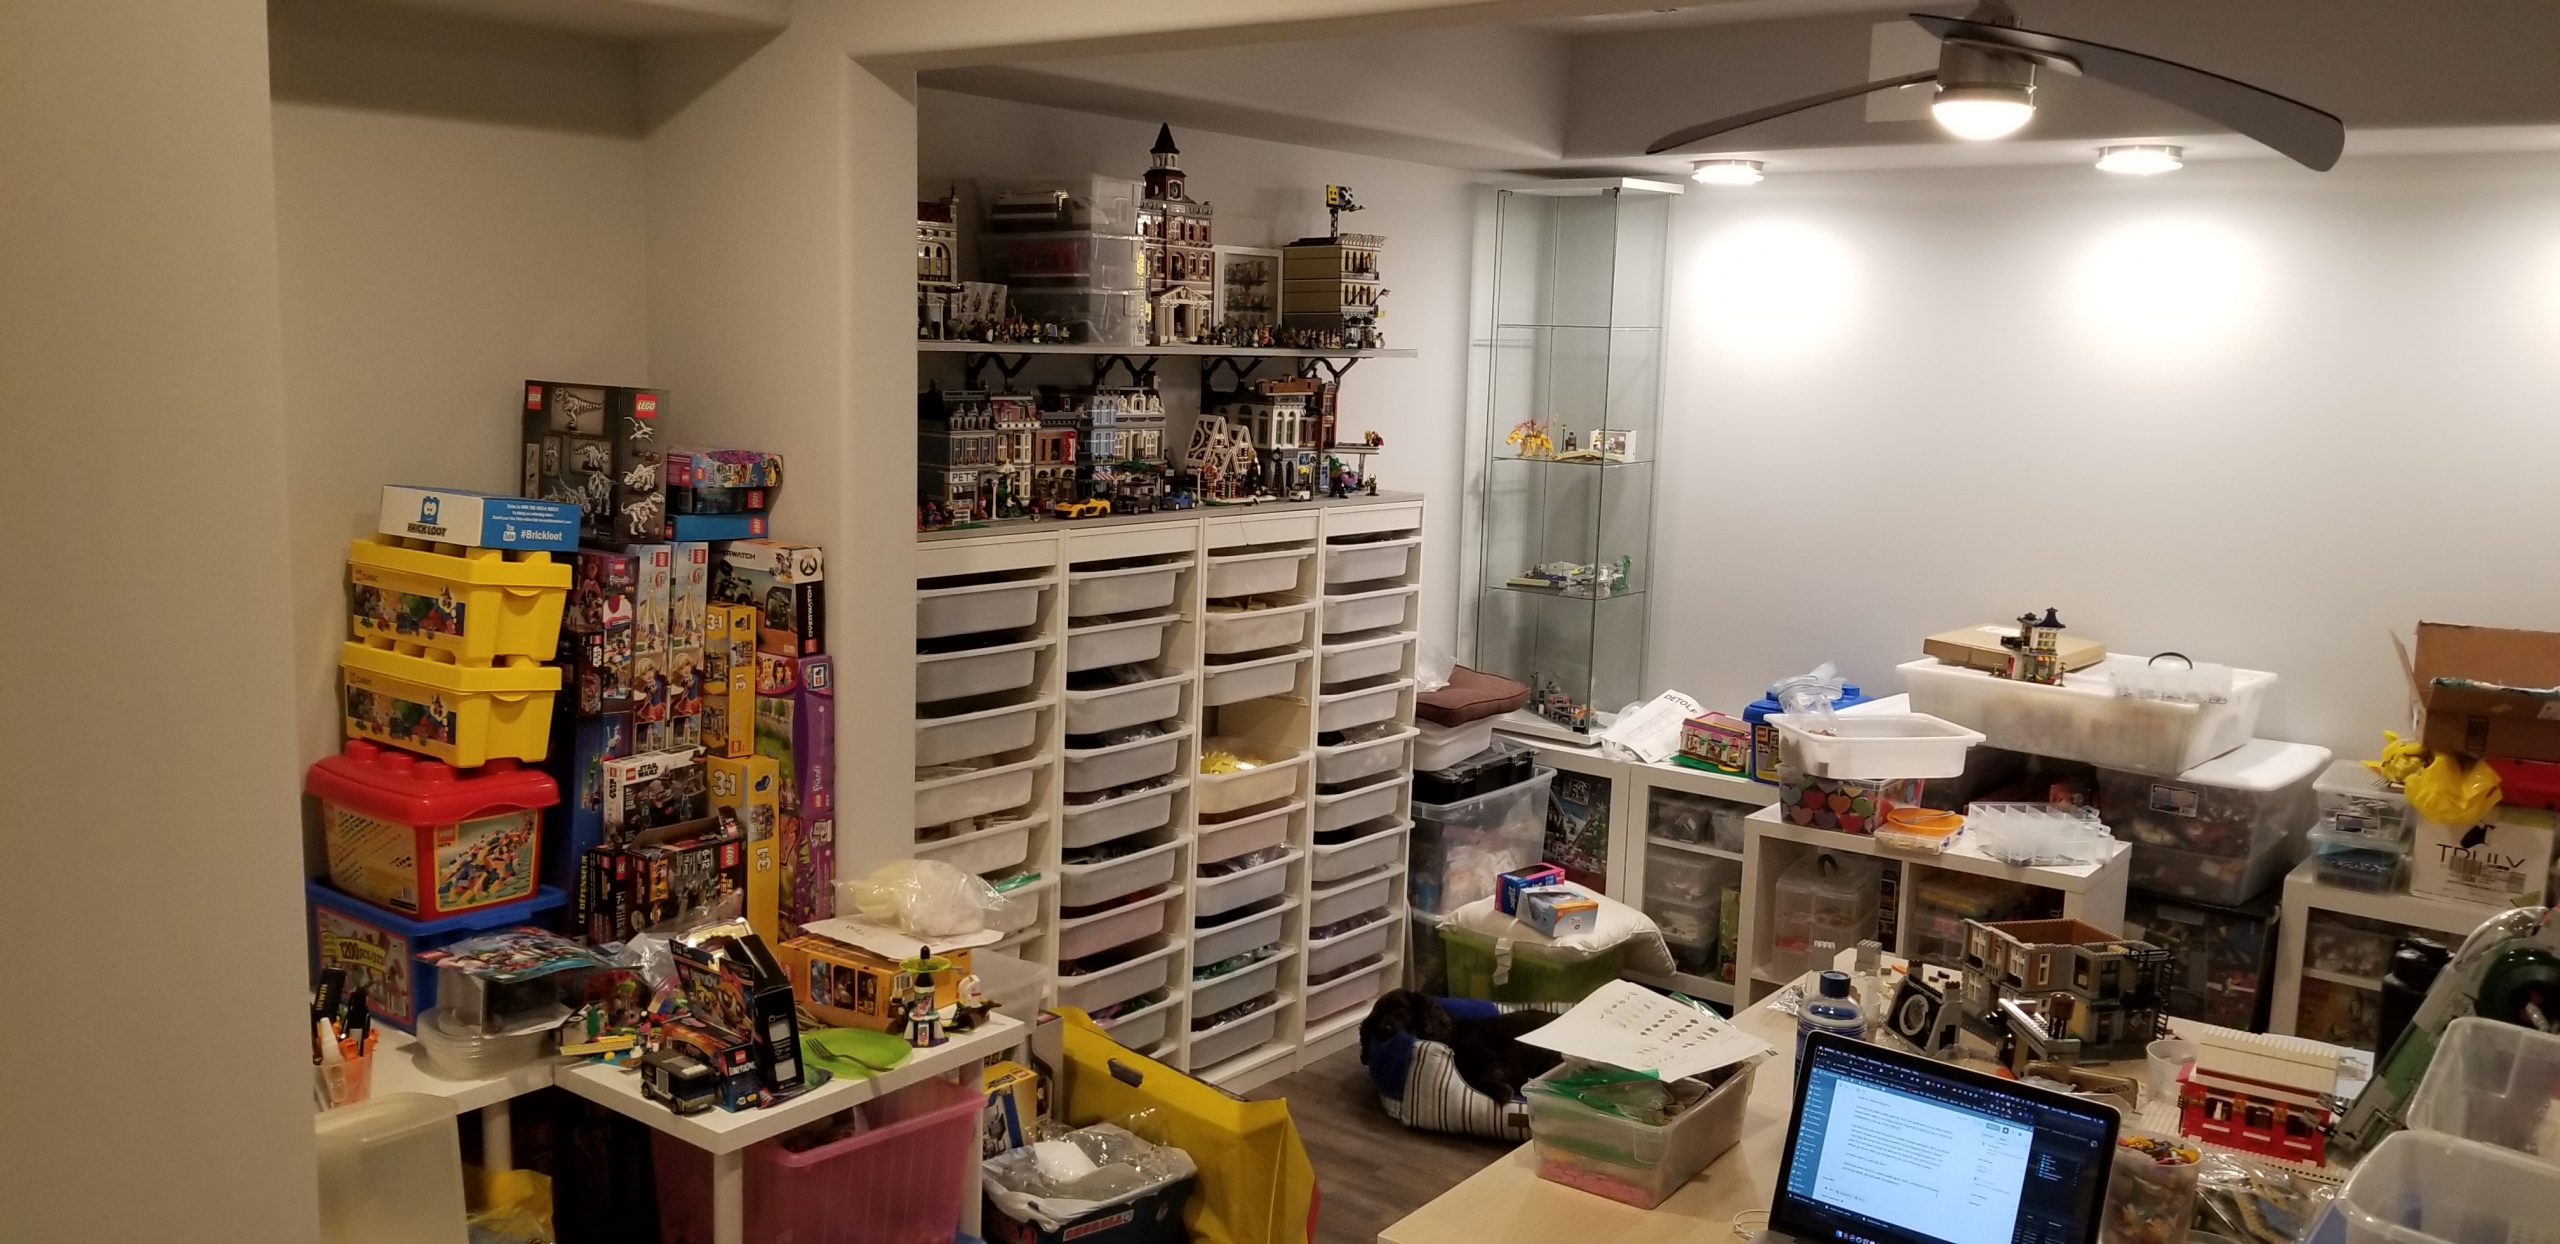
Still a hot mess! But it is a more usable space. All the sorting I've done lately filled up our Trofast bins, but we're closer to having fully sorted all the loose brick we have everywhere.
And that's what we've been doing all this time.
Wow. Amazing job! Thank you for identifying which products you used in this remodel.
Thanks! And no problem!
Like your set up and original ideas vs. People just putting sets together! Nice job